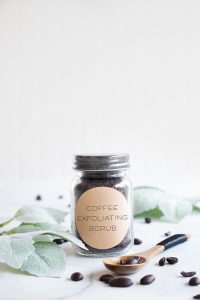
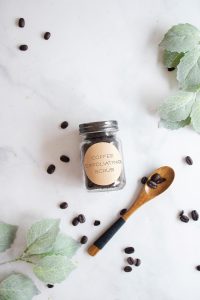
Treat yourself to a homemade DIY exfoliating coffee facial scrub! This gentle exfoliator will remove dead skin cells, moisturize, and even your skin tone. Get bright, awakened, and radiant skin in just 5 minutes!
I am a cheapskate by nature, however I am also the first to admit that fact. If there is a penny to save, I am going to find a way to make that happen. I consider the “higher priced” items in my life investments rather than “splurges”. There is a difference. High quality food, camera equipment and technology required for my work, vacations with the family, and my most recent addition… skincare & makeup. Those are things that matter the most to me when it comes to my lifestyle, so it makes sense that I would spend a little bit more on them.
However, I am also a DIY’er by nature. I am that woman who constantly thinks to herself “Can I make that myself?” BEFORE I make my purchases. Some people cannot be bothered with making things on their own, but again I’m cheap. Furthermore, I do find great satisfaction in replicating products I would have purchased. It is therapeutic to me, not to mention fun for me. It does also help that I also love anything and everything crafty.
So when it comes to many everyday items, you can usually find me DIY’ing it up. Case in point with my new exfoliator! When I switched my entire skincare and makeup over to Beautycounter, my skin went through some changes. This typically happens as your skin adjusts to new ingredients and products. Parts of my face were really dry and started getting flakey. At first I was scared my skin did not like Beautycounter, but as it turns out it was just priming itself for a new layer of truly healthy skin!
10 Reasons To Exfoliate:
- get rid of dead skin cells
- improve absorption of your high quality skincare regimen
- makes skin smoother & brighter
- make up goes on easier and more evenly
- reduce blemishes and discoloration
- prevents break outs
- increase blood flow and circulation
- shrinks pores
- prevents ingrown hairs
- increase collagen production (a KEY component in healthy, glowing, and youthful skin)
Instead of spending any amount of money on a high quality and less toxic exfoliator, I decided to make my own. It’s crazy easy and since I had all of the ingredients, it was a no brainer. All you need is a handful of “ingredients”, a jar, and 5 minutes.
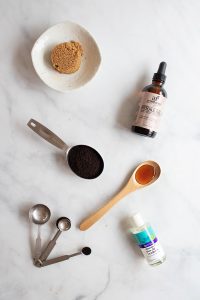
INGREDIENTS:
- fresh coffee beans (finely ground)- reduces puffiness, awakens skin, tightens, calms inflamed skin, brightens, gentle, cost effective
- brown sugar- moisturizing, firming, hydrating, cost effective, gentle, improves skin tone
- honey-moisturizes, cleanses pores, adds a natural glow, lightens scars and evens discoloration, brightens complexion
- jojoba oil- hydrating, antioxidant, anti-microbial, anti-inflammatory
- vitamin E oil- moisturizing, reduces any skin irritation, minimizes the appearance of scars/wrinkles/fine lines
- vanilla bean paste- anti-inflammatory properties that can help soothe irritated skin, antioxidant, and contains B vitamins which can help maintain healthy looking skin.
Depending on how much exfoliator you want to make, the amounts of each ingredients will vary. I wanted to start off with a smaller-ish amount to test it on my skin first. Certainly there is no need to waste good quality products making a big batch if my skin did not like it!
This is what I used for my first batch:
- 1/4 cup ground coffee
- 1/4 cup brown sugar
- 2-3 tablespoons honey (if you want it to “stick” more, use 3 tablespoons)
- 2 teaspoons jojoba oil
- 2 teaspoons vitamin e oil
- 1/4 teaspoon vanilla bean paste
Just throw everything into a bowl, mix until all of the ingredients are well incorporated, and put it into an airtight glass jar or container! I love THESE little mason jars for crafts and projects like this.
How often should you exfoliate?
Exfoliating is extremely beneficial for the skin, you do not want to overdo it. On the other hand over exfoliation can lead to skin irritation. If you think about it, the main purpose of exfoliating is to remove a layer of skin (dead skin cells). In that process you need to let that layer heal before removing more. Also, over exfoliation can rob the skin of its natural oils when done too frequently.
- once a week for sensitive skin
- 2-3 times per week for normal to combination skin
What should you use AFTER you exfoliate?
- For normal, oily, or combination skin- give your face a boost with some facial oil. I recommend Beautycounter’s No. 1 Brightening Oil. This is actually your daily radiance boost! It quickly absorbs and penetrates to awaken and replenish skin. Unlike other oils on the market, this is very very lightweight and silky smooth.
- For dry skin- moisturizer, moisturize, moisturize. Start with an Intense Moisture Face Serum, then follow it up with either a daytime moisturizer OR a nighttime Recovery Sleeping Cream. This regimen contains safe ingredients like hyaluronic acid, plum oil, vitamin C, and arginine which helps skin look more youthfully smoother, softer, and more radiant.

No Comments